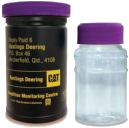
Grease Analysis
Incorrect grease selection can lead to costly downtime and repairs. Analysis from Hastings Deering Laboratory Services ensures the grease is suitable for application and in good condition. Contamination and wear levels are easily identified and reported along with a photograph of the debris and a wear severity graph to highlight compartment condition.
Elemental Analysis
Grease is a combination of lubricant mixed with a thickener such as a metallic soap, clay or polymer material to achieve the correct consistency.
Elemental analysis on grease is used to detect fine wear debris, contaminants such as dirt and additives. eg. ZDDP (Antiwear / Antioxidant).
Lithium is one of the most common grease soap constituents and is determined by ICP after digesting the grease soap in a mixture of solvents.
Cone Penetration / NLGI
The Consitency Number (or NLGI value) is dertermined from the cone penetration test and is a direct measure of the grease's consistency.
Different applications require either softer or harder grease compounds. Typical general purpose greases have an NLGI value of 2.
Water
Water content in grease is determined using the hotplate method. Water content can cause changes to the grease consistency and corrision of the lubricated components.
Premium grease sample kits will also include water testing by Karl Fischer to more accurately determine the water content.
Different applications require either softer or harder grease compounds.
PQ Index
PQ Index measures the overall ferrous content present within a grease sample. This content could be comprised of large pieces of metal or tiny particles mixed in with the grease. The higher the PQ value, the more contaminated the sample is with ferrous metal. PQ Index is a dimensionless value, so the value is not reported using any units.
Drop Point
Drop Point is the temperature at which the lubricant separates from the grease soap. This is mainly a characteristic of the type of soap used and is an indication of the usable temperature range of the grease.
Visual Inspection
Samples are routinely inspected by an operator, looking for any abnormal contaminants. Large pieces of metal, water, and any other foreign substances can be detected using this technique.
Ferrography
The ferrogram is a technique to prepare samples for microscopic examination by separating ferrous wear particles in a magnetic field. This will sort the particles according to their size distribution and segregate the ferrous and non-ferrous components.
The disadvantage when using this method is that non-ferrous components may be under represented during analysis. It is however a good technique for analysing grease samples and heavy gearboxes where the majority of the wear is expected to be ferrous alloys.
